
Prt.1 – Hak5 Cloud C2 Setup on AWS

What is Cloud C2?
Cloud C2 makes it easy for penetration testers and IT security teams to deploy and manage Hak5 gear from a simple self-hosted cloud managed platform. Cloud C2 allows you to maintain access for engagements, continually monitor and assess environments with Hak5 gear implants.
Cloud C2 currently supports several Hak5 devices including the WiFi Pineapple, LAN Turtle, Packet Squirrel, Signal Owl, ScreenCrab, Shark Jack and the KeyCroc.
Self-Hosting Cloud C2 in AWS – Step by Step Guide
Step 1 – Signup for AWS
Sign-up and Create your AWS hosting account.
Step 2 – Creating & Configuring a Lightsail Instance
In this setup of Cloud C2, we will utilize a single Amazon Lightsail instance for $5 a month to run our public Cloud C2.
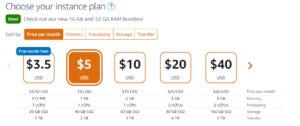
Step 2.1: Create your instance in Amazon Lightsail
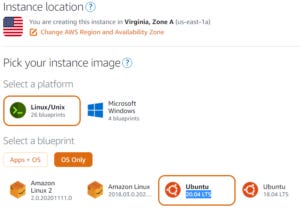
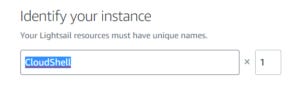
Next, create and instance by selecting the instance “location/region” that works best for you, and select a “Linux/Unix” platform as an "OS Only" option. In this blog, we will be utilizing the latest Ubuntu LTS release and naming the instance to identify our LightSail resource (especially helpful, if you are running numerous instances in Lightsail). See screenshot below for details.
Step 2.2: Configure Lightsail Instance for Cloud C2
In the next steps, we will configure our Lightsail instance to allow network communications from our Hak5 devices to properly communicate to the Cloud C2 platform. Please keep in mind, using stricter network rules can prevent public facing instance exposure, but for this blog post we are not restricting IP Addresses. In a controlled assessment, we would highly recommend utilizing a restricted IP address list, or VPN relay to access the Cloud C2 portal during engagements.
Step 2.2.1: Attach Static IP to Lightsail Instance
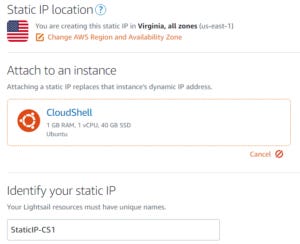
Select the networking tab, and create a static IP you can assign to your instance. Next, select your instance, and add an identifier name for the static IP. See screenshot below for details.
Step 2.2.2: Configure Lightsail Firewall Rules
In this step, we will configure the proper firewall rules on our Cloud C2 instance to allow our Hak5 devices to properly communicate. Please remember as stated before, it is always best practice to utilize restricted IP addresses or VPN access for public instances to reduce your attack surface. For this demonstration, we are leaving this instance public. To configure firewall rules, select the Networking tab and navigate to the firewall. Scroll down and click the "+ Add rule" to configure rules. We will add several rules to our firewall. Add HTTPs, Custom TCP port 2022 and 8080. See screenshot below for details on port configuration.

Step 3 – Setting up Cloud C2
Step 3.1: Accessing Lightsail Instance
To quickly access your Lightsail instance, click on the “connect” tab in the top left. Then select Connect securely using your browser by “Connect Using SSH”. This will connect you to your instance via a SSH webshell. You can also configure your own SSH client as well. See screenshot below.

Step 3.2: Install Cloud C2 with a Bash Script
During these steps, we will have to install UnZip, since it is not natively installed on the AWS Lightsail Unbuntu Instance. We will also utilize a Cloud C2 bash script that will automagically install the latest version of Cloud C2. Once you are in the “Connect” console, copy and paste the script below to install Cloud C2. Remember, you will have to register to get a valid license key from Hak5 which can be obtained free on the Hak5 website - https://shop.hak5.org/products/c2#c2-versions. See bash install script below.
3.2.1: Install UnZip
sudo apt install unzip
3.2.2: Cloud C2 Install Bash Script:
wget https://c2.hak5.org/com -q -O c2.zip && unzip -qq c2.zip && \
IP=$(curl -s https://checkip.amazonaws.com) && \
echo "Copy the below setup token and browse to http://\)IP:8080" && \
./c2_community-linux-64 -hostname $IP
Step 3.3: Activating and Setting up Cloud C2
Once the script is complete, you will get a setup token and a browse path where your Cloud C2 instance is running. Next, navigate to your Cloud C2 instance, and finish the activation process.

3.3.1: Setup Cloud C2 Account
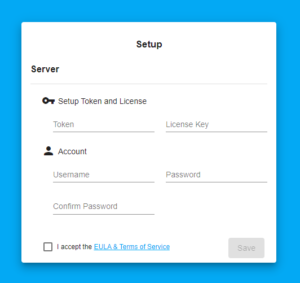
In this setup process, you will be prompted to enter your valid “License Key” that would have been sent to you after your Hak5 Cloud C2 registration process. Check your email for the “Hak5 Cloud C2 Download & License” from step 3.2 – Obtaining an active Cloud C2 License ( https://shop.hak5.org/products/c2#c2-versions ). The setup token will be provided if the script runs successful.
Step 3.4: Logging into your Cloud C2 Instance.
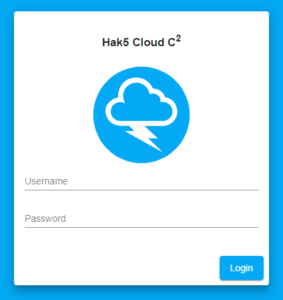
Once your account has been setup, you can navigate to your C2 Cloud instance, and login with the newly created Username and Password that was created during the setup process.
Step 4 – Enjoy! Happy Hacking…
Start adding Hak5 approved devices such as WiFi Pineapple, LAN Turtle, Packet Squirrel, Signal Owl, ScreenCrab, Shark Jack and the KeyCroc to your Cloud C2 instance. Adding devices to Cloud C2 getting started guide can be found [at] https://docs.hak5.org/hc/en-us/articles/360014295634-Adding-Devices-to-Cloud-C2
Cloud C2 Dashboard

References:
[1]. Cloud C2 Downloads – https://shop.hak5.org/products/c2#c2-versions
[2]. Hak5 Devices – https://shop.hak5.org/
[3]. Cloud C2 Installation and Setup Guides – https://docs.hak5.org/hc/en-us/articles/360012947534-About-Cloud-C2
[4]. Adding Devices to Cloud C2 – https://docs.hak5.org/hc/en-us/articles/360014295634-Adding-Devices-to-Cloud-C2
Prt.2 – Hak5 Cloud C2 SSL Setup on AWS - (Coming Soon!)


